RobotPy
Programming Robots
FRC Phases
An FRC robot has four phases:
- disabled
- Called when robot should stop (usually at the end of a game)
- autonomous
- Called when robot is in autonomous mode
- teleop
- Called when robot is in teleoperated mode
- test
- Called when robot is in test mode
Each phase has two aspects:
- init
- Called once to get things ready
- periodic
- Called 50 times a second
Uh….
Working with the Phases
How do this really work in practice?
During the time when drivers control their robots:
- FRC Game sends a
teleopInitsignal - Robot code sets up a variable to the Joystick
- Robot code sets up a variable to the Motor
- FRC Game sends a
teleopPeriodicsignal - Robot code listens to the Joystick setting
- Robot code moves the a motor “a bit” because the Joystick is set to forward.
- Robot code moves the a motor “a bit” more because the Joystick is still set to forward.
Robot Programming Warnings
- Never use delays (you will momentarily lose control of your robot during the delay, and it will not be as responsive)
- Avoid using loops (unexpected conditions may cause you to lose control of your robot)
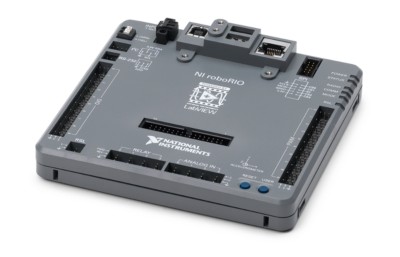
What is a RoboRIO?
- Small computer used to control a robot
- Lots of input and output connections
- No display … write on laptop and download
- Typically runs code written in Java or C++
What is Java and C++?
Both Java and C++ are:
- compiled
- difficult to learn
- quite verbose
How Verbose?
Here is a function written in Java:
public int[] increment(int[] array) {
    int[] newarray = new int[array.length];
    for (int i = 0; i < array.length; i++) {
        newarray[i] = array[i] + 1;
    }
    return newarray;
}
Here is the same function in Python:
def increment(array):
  return [i + 1 for i in array]
What is RobotPy?
Allows students to write robot code for RoboRIO in Python

Note: We need to use Python version 3.4 or larger
RobotPy Projects
robotpy-wpilib: the python implementation of WPILib for FRC pyfrc: provides unit testing, realtime robot simulation, and easy upload capabilities for your RobotPy code roborio-packages: Various python packages for the RoboRIO platform installable by opkg, including the python interpreter and numpy robotpy-wpilib-utilities: Community focused extensions for WPILib pynetworktables: python bindings for NetworkTables that you can use to communcate with SmartDashboard and/or your robot. pynetconsole: A simple netconsole implementation in python robotpy-cscore: Python bindings for cscore, a powerful camera/streaming library roborio-vm: Scripts to create a QEMU virtual machine from the RoboRIO image file
Getting Started
Install the pyfrc project on your laptop (using
pip)pip3 install pyfrc
- Install supporting Python modules on your laptop
- Install RobotPy on the RoboRIO
Developing Notes
- Your robot code must start within a file called
robot.py Add the following to the top of our code:
import wpilibInherit from a parent class:
class MyRobot(wpilib.IterativeRobot):
Create a
robotInitfunction to create instances of your motors and hardware devices, e.g.def robotInit(self): self.motor = wpilib.Jaguar(1)
Developing Notes, 2
- Most WPILib examples are written in Java
- The WPILib implementation in RobotPy is very similar
- Examples just need to be translated
Interrogating WPILib
Want to create an object to interact with the Jaguar motor
controller through a PWM? Use bpython:
pip3 install bpython
Use it instead of python, and hit Tab to learn:
(robotpy) root@blobfish:~# bpython
bpython version 0.16 on top of Python 3.5.2 /root/.virtualenvs/robotpy/bin/python3
>>> import wpilib
>>> wpilib.Jaguar(
┌─────────────────────────────────────────────────────────────────────────────────────────────────────┐
│ wpilib.Jaguar: (self, channel)                                                                      │
│ A Jaguar Constructor.                                                                               │
│                                                                                                     │
│ :param channel: The PWM channel that the Jaguar is attached to. 0-9 are on-board, 10-19 are on the  │
│ MXP port                                                                                            │
└─────────────────────────────────────────────────────────────────────────────────────────────────────┘
Containing RobotPy
Let’s create a virtual environment:
pip3 install virtualenvwrapper
source /usr/local/bin/virtualenvwrapper.sh
mkvirtualenv robotpy
To use it, run the following (or put in .bashrc):
source /usr/local/bin/virtualenvwrapper.sh
workon robotpy
Glossary
- PWM
- Pulse-width modulation for variable speed fans


