TMUX: My Getting Started Guide
Terminal multiplexer is the cool name for TMux, which replaces Gnu Screen. In advertising this app to colleagues, I figured I would write the Complete Getting Started Guide to TMux. What follows, however, is just the stuff that I think is cool. In others, a very-opinionated guide.
Why use it? A few use cases for your consideration:
- Network connection drops ending your long running server processes? No problem, as you would just re-connect to your tmux sessions.
- Kick off lots of virtual tabs to various processes with single script. This lets you see server logs at any time.
- Multiple tabs and split screens no matter what terminal emulator you are using. I suppose this is less of a compelling use case since you are always logging into your server from your one laptop.
- Use the wemux Shell Script to share the same tmux sessions.
What does it look like? Not much. The virtual tabs to different processes (like shells) are shown across the bottom of the screen:
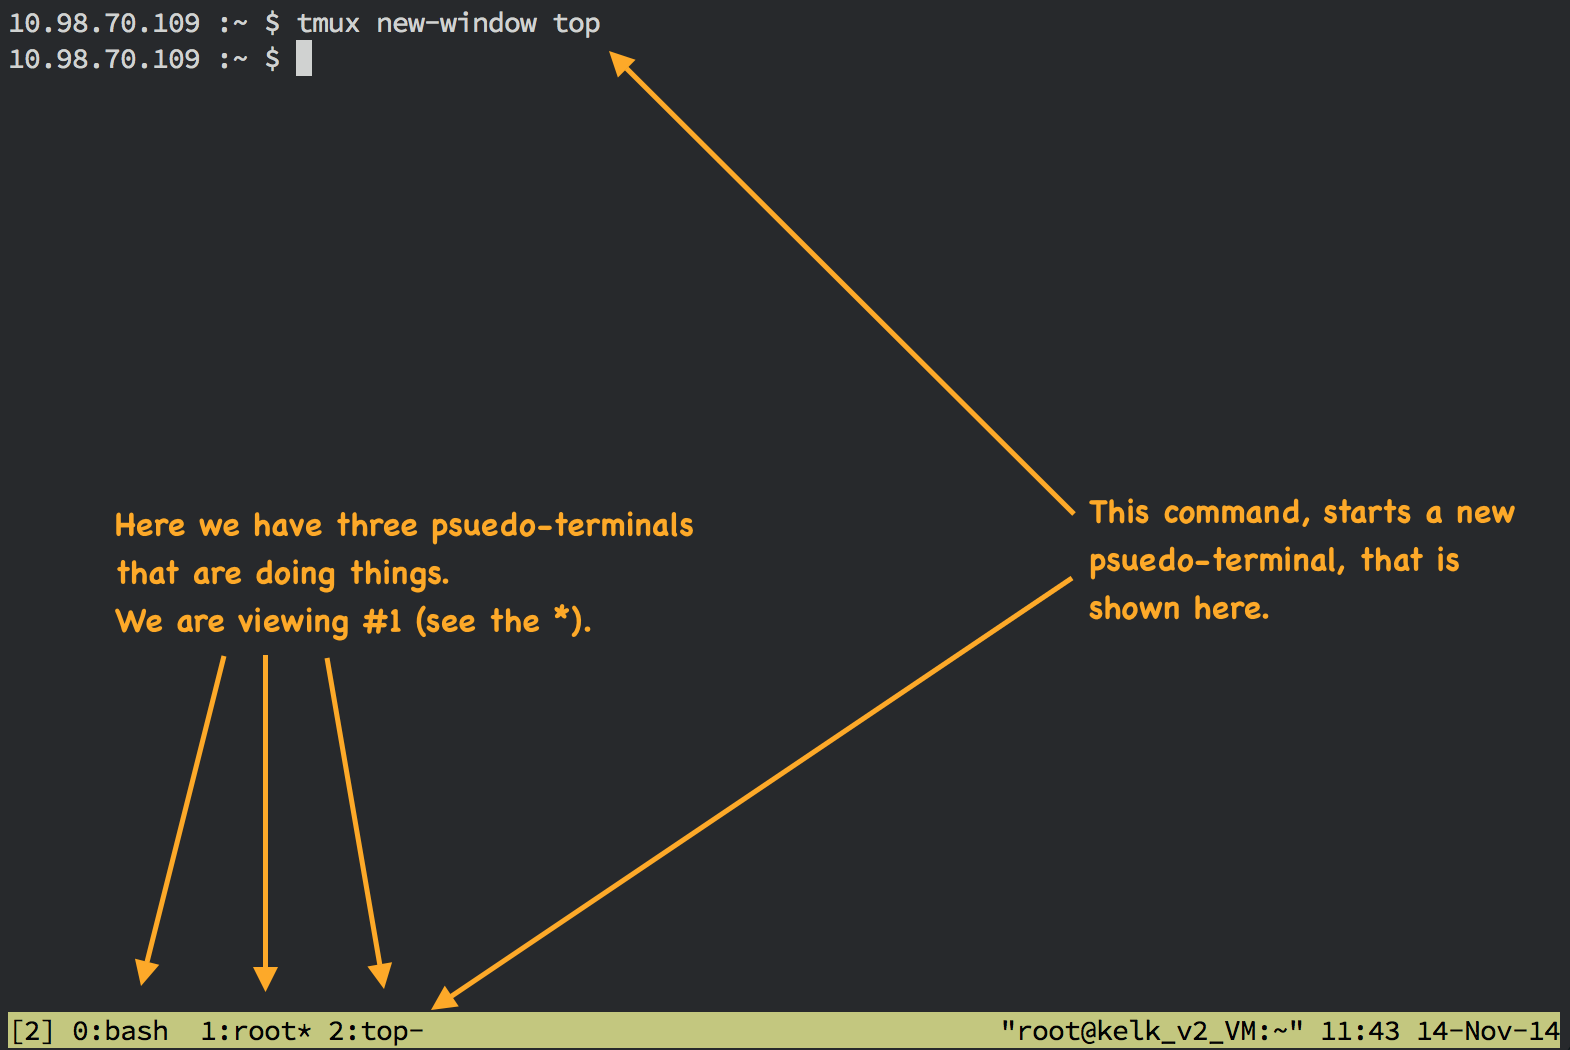
(Is it too ugly for you? Check out the screenshots under the iTerm2 section below).
Installing
TMux typically runs on your server, so depending on your
distribution, you would install it with either yum or apt-get
(or even Homebrew on the Mac, with brew):
yum install -y tmux
However, you will want to make sure you have version > 1.8 to use GUI features on your laptop. So, feel free to download the source and build it (pretty straight-forward). Try this in the source directory:
sh autogen.sh && ./configure && make && sudo make install
Done. Let’s play.
Starting
When you log into your remote machine, you will want to either start
tmux or attach to one that is already running (with tmux
attach). If you attempt those commands in the reverse order, you
can do it with one command:
tmux attach || tmux
You don’t want to run that when you are already attached, so I check
to make sure the TERM environment variable is not set to screen
before running it.
I usually run this script (I call it t) installed on each of
my servers. I then log into the server via: ssh some-host -t ~/bin/t1
if [ "$TERM" != "screen" ]
then
    if type tmux >/dev/null 2>&1
    then
        tmux att || tmux \
            new -s Joseph -n shell \; \
            neww -n mysql "mysql -u $DB_USER -p$DB_PASS $DB_NAME" \; \
            neww -n ruby  "irb"
    fi
fi
The tmux executable can take commands where each command is
separated with a \; (to escape it from the shell). While I split
the commands on three lines, this is really a single line as the end
of each line needs to have a continuation \ as the last
character… again, this is a shell-ism.
The three lines following the tmux call specifies these starting
commands:
- The
newcreates a new “session” (see below for details), which starts a new shell session that I name (with the-noption) “shell” (yeah, how original). - The
newwcreates a new virtual tab (or window) the first is called “mysql” and then runs themysqlexecutable. - The last line creates a new tab named
rubyand runs theirbcommand.
In summary, this script either attaches to my previous session, or
creates a new session and automatically opens up three virtual
windows. You can easily specify other tabs that tail -f log files,
runs your test suite, etc.
Configuring
Once your TMux session is running, you open additional virtual
terminals and other interactive commands by hitting a prefix key. In
screen, this prefix is Control-A, and tmux uses Control-B.
Both are pretty bad, since I’m used to Control-A to get me to the
beginning of the line, and Control-B to move backwards a character
(sure, I could just use the arrow keys, but committed those key
bindings into my finger memory 30 years ago when we didn’t have
arrow keys).
If you are an Emacs user, you may want to change this to the Escape
key, by creating a $HOME/.tmux.conf file on your server:
unbind C-b
set -g prefix Escape
bind Escape send-prefix
If you’re a VI user, the following let’s you switch sessions with
` (the backtick character):
unbind C-b
set -g prefix `
bind ` send-prefix
A better approach would be to use the Command, or Windows key on
most keyboards, but this would require changing both tmux and your
Terminal emulator program, see this discussion and this response for
details.
I find the following entries in the $HOME/.tmux.conf to be
helpful, as it allows me to hit the F1 function key to select the
first window, and F2 to select the second one, etc.
# Start windows and panes at 1, not 0
set -g base-index 1
set -g pane-base-index 1

# Bind function keys.
bind -n F1 select-window -t 1
bind -n F2 select-window -t 2
bind -n F3 select-window -t 3
bind -n F4 select-window -t 4
bind -n F5 select-window -t 5
bind -n F6 select-window -t 6
bind -n F7 select-window -t 7
bind -n F8 select-window -t 8
bind -n F9 select-window -t 9
bind -n F10 select-window -t 0
One last one that I use is to put the name of the system I’ve logged into on the right side:
set -g status-right "| #(hostname) "
Using
Using the prefix key I mentioned above, allows you to do lots of things, for instance:
Ctrl-B c- Create a new terminal shell, you’ll see its “number” at the bottom of the screen.Ctrl-B# - Where the # is the terminal number listed at the bottom of the screen, e.g.Ctrl-B 0Ctrl-B, - Rename the virtual tab so that you can remember what you are running in any particular shell.Ctrl-B“ - To split the terminal into two panes one on top of the other.Ctrl-B %- To split the terminal into two side-by-side panes.Ctrl-Barrow-key - To move the active cursor to the “other” pane you created in the previous command.
If interested, I recommend reading this Crash Course article, and If you know screen, you can compare the differences with this cheat sheet.
Scrolling Around
If you want to view lines that have scrolled off the screen, first
hit: Ctrl-B [
Now you can use the arrow keys to move a “scrolling cursor” (by the way, this is how you can also copy and select text without using the mouse).
The keys, however, is based on Emacs, so Alt-v scrolls up a page
and Ctrl-v scrolls down. I hear you can change these to VI
keybindings if you are more comfortable with that.
Hit q to stop scrolling around and return to the bottom of the
terminal output.
Note: If you use iTerm (instead of the default Terminal
application), you can scroll around using the scrolling
capabilities of the mouse (see these instructions to get it to work
with Terminal). To do this, add the following to your
~/.tmux.config file:
set -g mode-mouse on
set-option -g mouse-select-pane on
set-option -g mouse-select-window on
set-window-option -g mode-mouse on
However, with the exception of jumping to multiple virtual tabs (screens), I do most of the work with shell aliases… let me explain what I mean in the next couple of sections.
New Window
This simple alias allows you to easy start a process in a new virtual tabs:
alias nw='tmux new-window'
Now, to run an interactive Python REPL in a new “tab”, you would enter:
nw ipython
You can also name the tab if it doesn’t make sense:
nw -n ruby irb
Where the -n option will specify the name at the bottom of the screen.
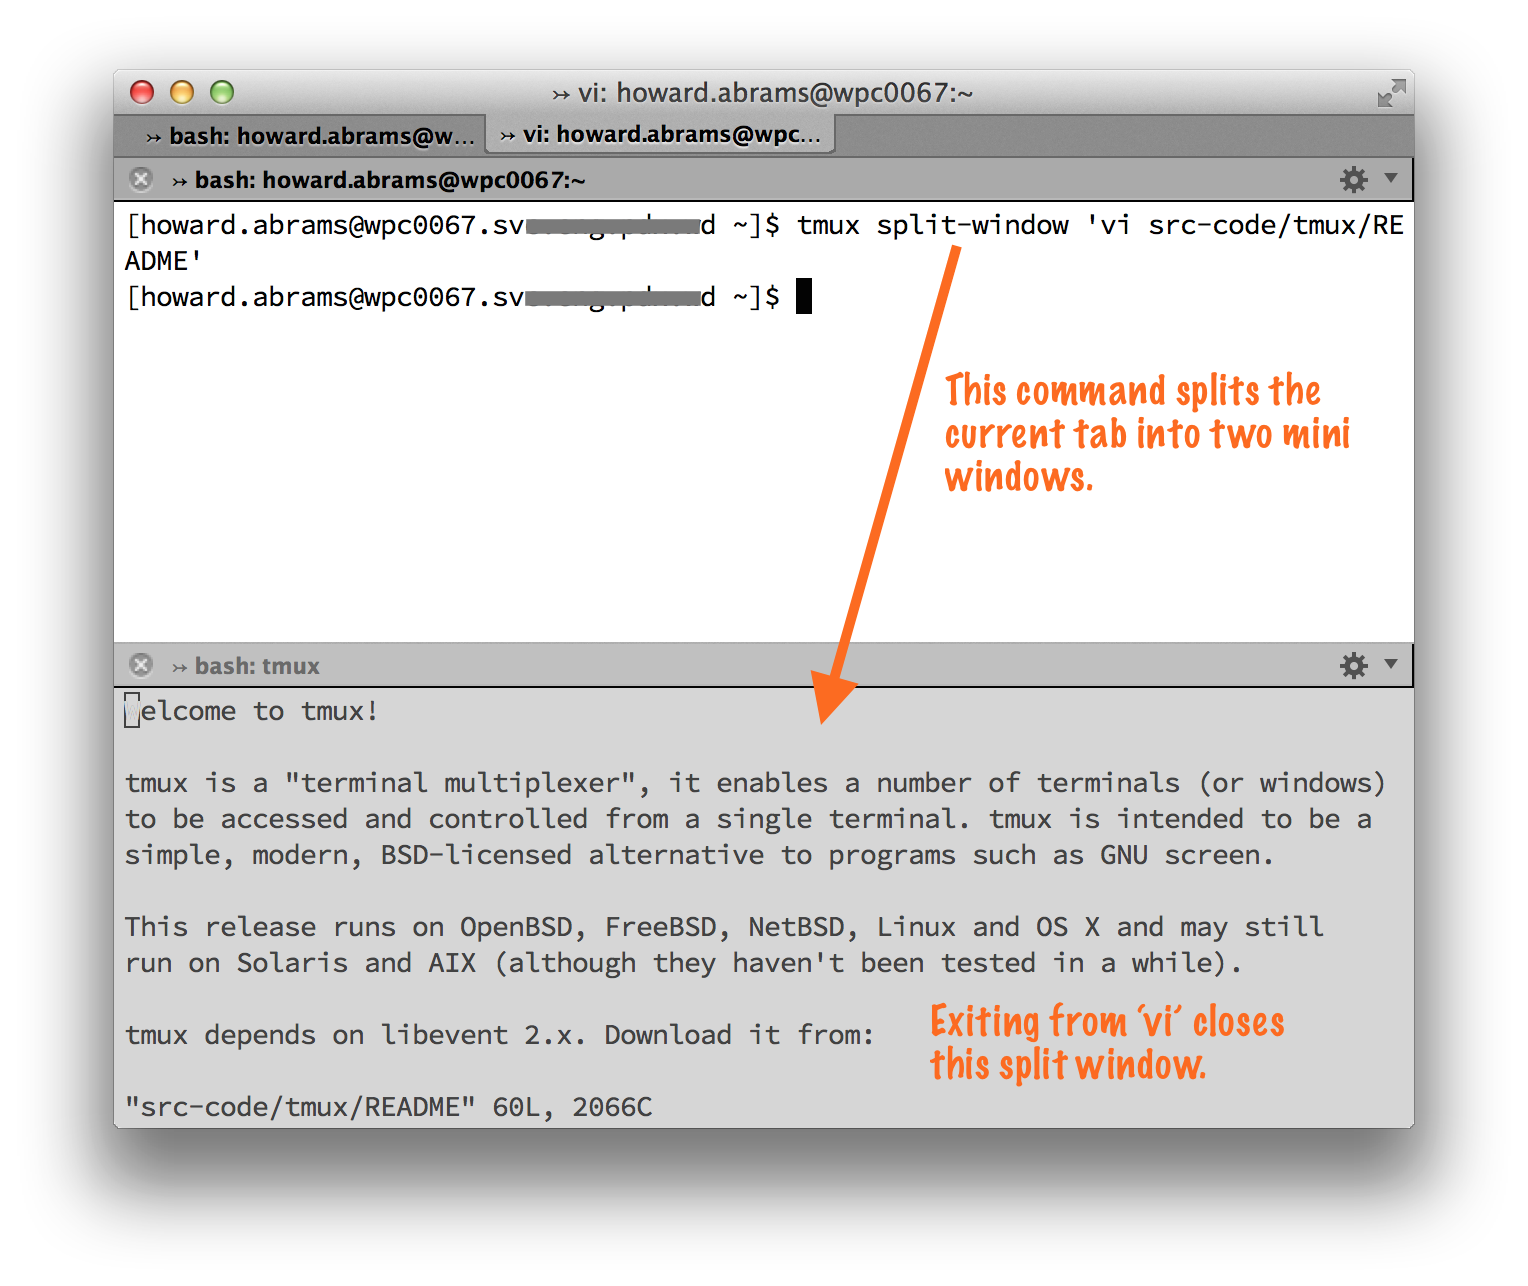
Split Windows
Another cool feature is to split the window and edit a file below,
but still be able to use the shell. For this, I create the
following functions, and add them to my .profile:
# Split the TMux window and edit a file in lower:
function e {
    tmux split-window -n "Edit: $@" "$EDITOR $@"
}
Session Management
Sessions are useful for completely separating work environments. For example, one may have a ’Client’ session and a ’Producer’ session.
To create a new tmux session, run:
tmux new -s <NEW_SESSION_NAME>
To attach a particular existing tmux session, run:
tmux attach -t <SESSION_NAME>
To switch to an existing session, run:
tmux switch -t <SESSION_NAME>
To list existing tmux sessions, run:
tmux list-sessions
Helpful TMux Commands
To list out every bound key and the tmux command it runs, issue:
tmux list-keys
To list out every TMUX command and its arguments, run:
tmux list-commands
To list out every session, window, pane, its pid, etc, run:
tmux info
To reload the current tmux configuration, run:
tmux source-file ~/.tmux.conf
Using with iTerm2
I know what you are thinking, wouldn’t it be nice to have real Mac windows instead.
The latest version of iTerm2 understand the TMux protocol, so that those pseudo-terminals become real windows and tabs on your Mac. Yes, it is a beautiful thing. How do you perform such magic? With these steps:
- Install iTerm2 on your Mac.
- Install TMux version 1.8 or later latest version of TMux on your server.
- Using iTerm2, SSH into the server and either start TMux or attach
to a previously running TMux with
-CCoption.
Your starting t script then becomes:
tmux -CC attach || tmux -CC
The tmux tabs will be shown in another window. You can do some extra iTerm magic with a menu item:
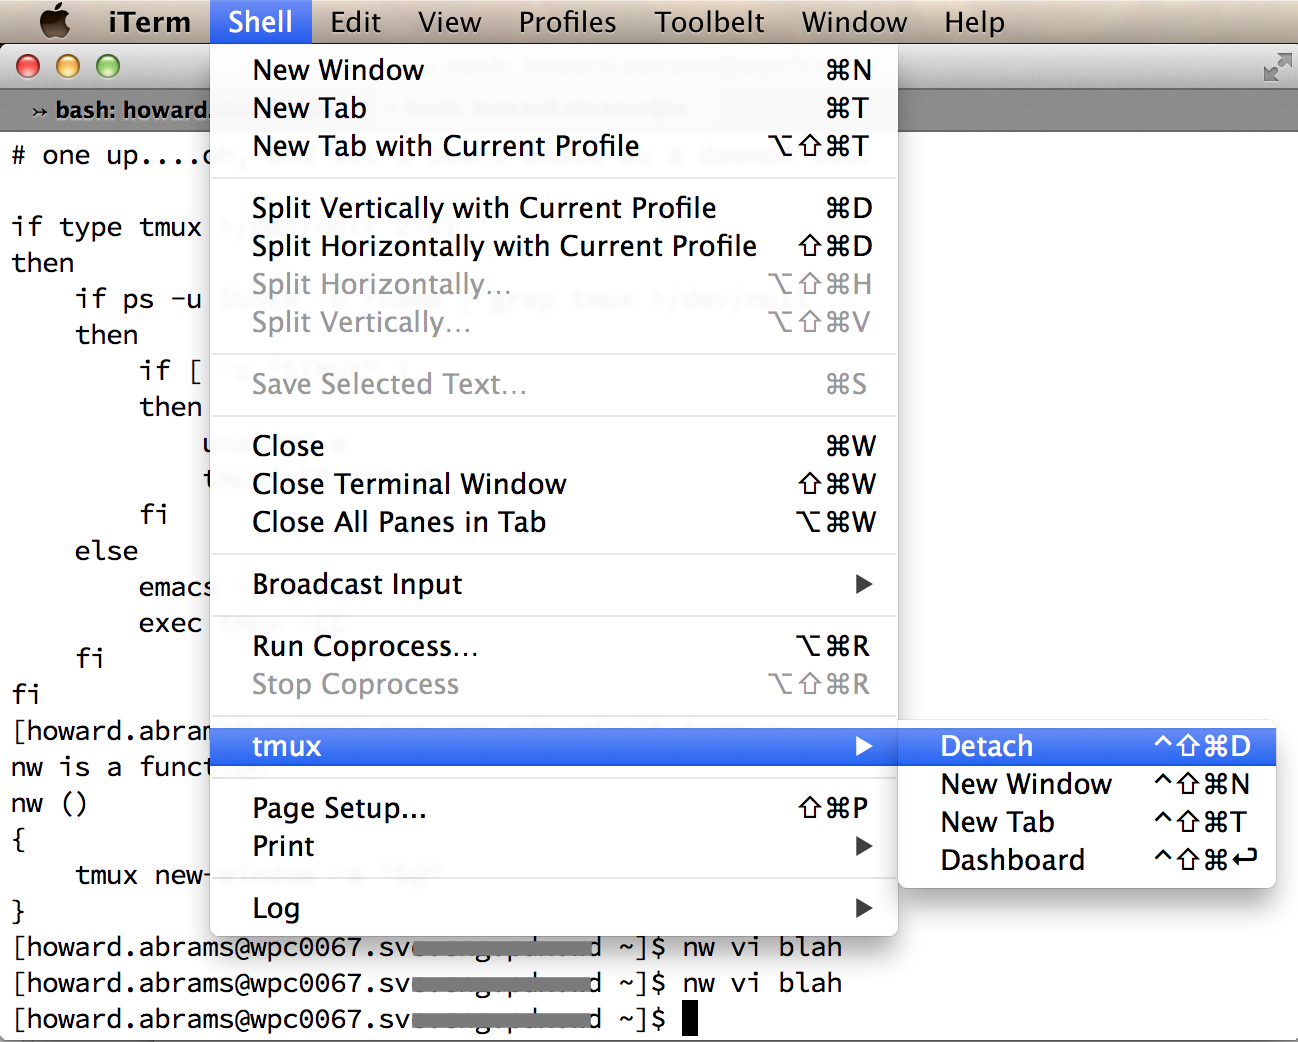
Note: This works unless you have already attached an iTerm2 to another TMux session on another computer. iTerm2 only likes one TMux session at a time.
Multiple Tabs
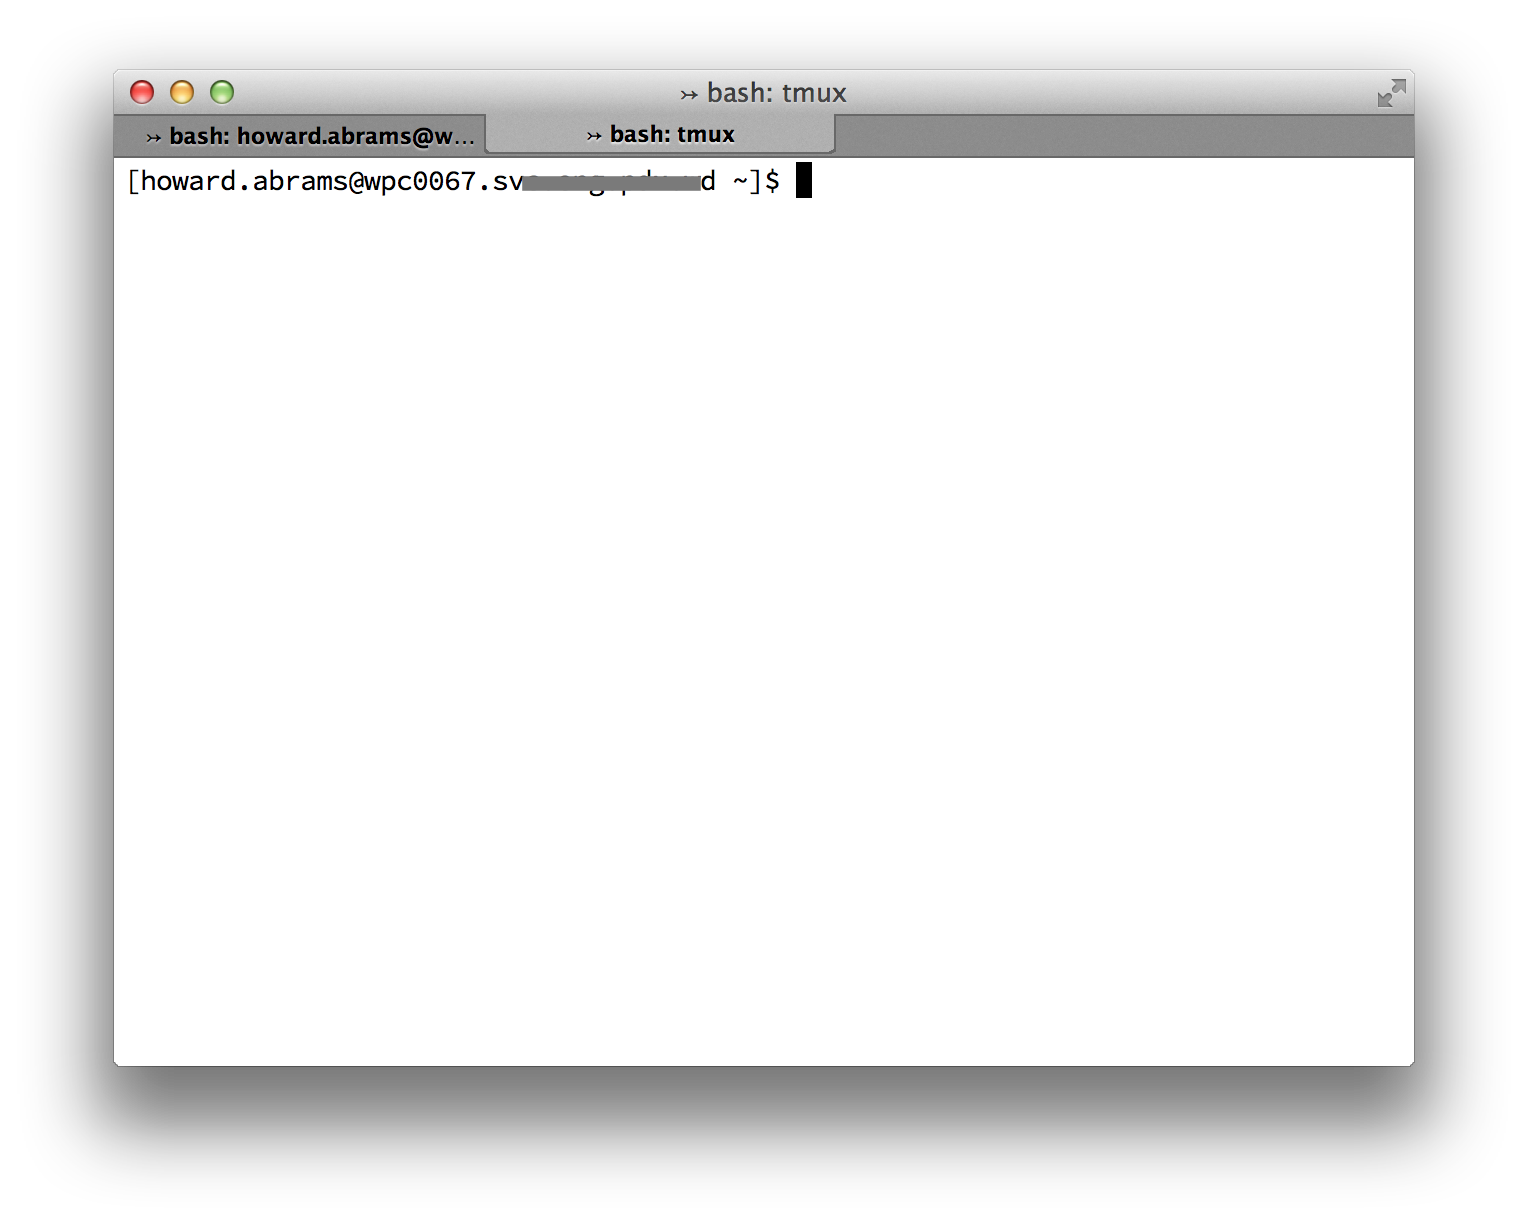
While in a TMux session, hitting Command-T to open up a new Terminal tab, opens a new tab on your server. That’s right, you don’t have to re-SSH into that system.
The tmux executable takes extra parameters that affect the currently running session, for instance:
Summary
Need more loveliness, see the following:
Footnotes:
When you give ssh a command to run, by default, ssh does
not allocate a psuedo-terminal (pty), so if you attempt to run tmux
directly from ssh, you’ll get this error:
open terminal failed: not a terminal
Adding the -t option forces ssh to allocate a pty. Chas. Owens
pointed me to this Stack Overflow answer for more information about
why a pty is not created by default for commands.


